How Do You Thin Oil-Based Paint
When it comes to painting projects, oil-based paints are often the preferred choice for professionals. Whether you're tackling a large interior project or painting your cabinets, knowing how to thin oil-based paint properly is essential for achieving the best results. Thinning oil-based paint can be tricky if you don't know what you’re doing, but with this guide, we'll walk you through everything you need to know about getting just the right consistency every time. So let's get started!
Thinning oil-based paint involves adding thinner like mineral spirits to reduce viscosity and make it easier to apply evenly across surfaces. This process also helps increase coverage while ensuring that brush strokes and roller marks stay minimal after drying. It's important not to overdo it when thinning oil-based paint as too much thinner will negatively affect adhesion and lead to uneven drying times.
At first glance, all of these steps might seem intimidating but fear not - with a few simple tips and tricks, anyone can learn how to thin their oil-based paints quickly and easily. In the next section of this article we'll show you exactly how it's done so keep reading for more information on mastering the perfect consistency every single time!
What Is Oil-Based Paint?
Oil-based paint is a type of coating that uses oil as the binder. It provides good adhesion, durability, and flexibility to surfaces with its long-lasting finish. Oil-based paints are also known for their ease of application compared to other types of coatings.
The most common form of oil-based paint in use today is alkyd enamel, which consists of an alkyd resin combined with pigments and solvents. Alkyds provide excellent resistance to water, chemicals, mildew, heat, and abrasion. They can be applied directly onto bare wood or metal for a glossy finish. For interior painting projects, latex paints may be used over oil primers for improved flowability and coverage.
Because oil-based paints take longer to dry than water-based products, they need special thinning agents like mineral spirits to reduce viscosity before application. Therefore when choosing this type of coating it's important to understand how each thinner affects drying time and performance.
Choosing The Right Thinner
As the adage goes, a poor workman blames his tools, and choosing the right thinner for an oil-based paint is no exception. The wrong choice of thinner can lead to an uneven application or poor adhesion of your chosen oil-based paint. To get it right, here are some points to consider:
- Check what type of solvent you need - Many thinners use different solvents such as mineral spirits, turpentine, or white spirit. Ensure you purchase the correct one according to your requirements.
- Review any health hazards associated with using a particular solvent - Solvents may release hazardous fumes when used which can be harmful if breathed in over long periods. Always read up on safety precautions before starting your painting project.
- Choose a high-quality product - Low-cost alternatives may not provide satisfactory results in terms of dilution power and longevity. Investing in higher quality products will ensure better performance and durability from your chosen oil-based paint.
Taking these factors into account will help you make an informed decision about which thinner best suits your needs for that perfect finish on all your painting projects! As important as selecting the right thinner is, safety considerations should also be taken into account before beginning any job involving solvents.

Safety Considerations
Thinning oil-based paint requires the use of a variety of chemicals, many of which are flammable and toxic. As such, it is important to practice safety when thinning oil-based paint.
First and foremost, make sure that you are working in a well-ventilated area. Open up windows or doors if necessary to ensure proper ventilation. Additionally, wearing protective clothing like long sleeves and pants is recommended as an extra precaution against splattering paint. Also, wear goggles and gloves for protection from the potentially hazardous fumes emitted by the solvents used during the thinning process. Finally, always keep a fire extinguisher close at hand just in case any sparks occur due to static electricity or other issues arising from using electrical equipment nearby.
Once safety precautions have been taken care of properly, we can move on to preparing the paint for thinning.
Preparing The Paint For Thinning
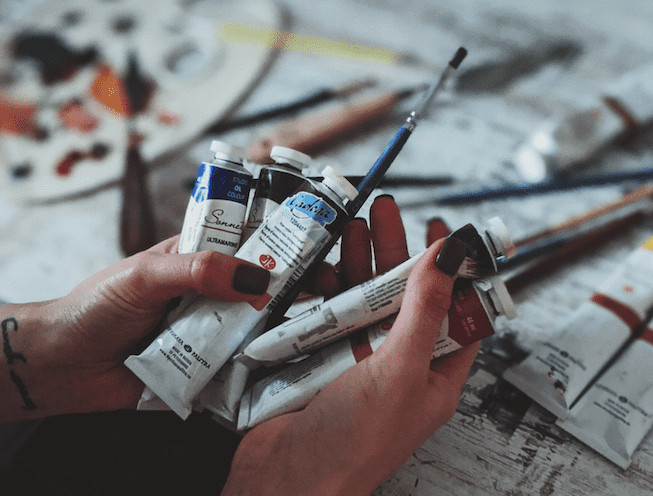
Before thinning oil-based paint, it is important to properly prepare the materials. To do this, you need to gather the supplies necessary for thinning and mixing. This includes:
Supplies | Description |
|---|---|
Paint | Oil-Based Paint in Need of Thinning |
Container | A Clean Container Used For Mixing The Paint And Thinner |
Gloves | Protective Gloves To Keep Hands Clean During Process |
Stirrer or Shaker | Tool Used To Stir or Shake Contents Of Container When Necessary |
Once you have your supplies ready, make sure that all of the tools are clean and free from dirt and debris before beginning. Remove any old dried-up paint if there is any visible on either the container or stirrer/shaker. You should also wear protective gloves while completing this task so as not to get paint on your hands and potentially cause a skin reaction. With these preparations complete, you can now move on to methods of thinning oil-based paints.
Methods Of Thinning Oil-Based Paint
Thinning oil-based paint can be a tricky task to master. Knowing the right method and materials is essential to achieving the desired outcome. As an important part of the painting process, it's important to get this step right.
The first thing you'll need when thinning your paint is mineral spirits or turpentine. Mineral spirits are most often recommended because they have fewer toxins than turpentine, making them more user-friendly.
Before adding any thinner to your paint make sure that you mix it thoroughly so that all of the pigments are properly combined. Once you've done this, add small amounts of thinner until you reach a consistency that is easy for brushing or rolling on walls or furniture surfaces. Make sure not to be over-thin as this could cause runs and drips on vertical surfaces.
Now that you know how to thin oil-based paints correctly, it’s time to move on to cleaning up after painting. Cleaning up requires special attention to prevent any damage from occurring due to chemical interactions between different substances used during the job.
Cleaning Up After Painting
When you're finished with a painting project, it's important to clean up properly. The process for cleaning up after using oil-based paint is slightly different than when using water-based paints. So, let's take a look at what needs to be done! Believe it or not, I was just about to reach for the trash can and get started on my cleanup when I realized there were steps I needed to follow.
The first thing that must be done is wash your brushes and any other equipment used in the painting job. Use mild soap and warm water to do this task and make sure all traces of paint are gone before drying them off with a cloth. You'll also need turpentine or mineral spirits if they've been used while painting - pour some over the brush bristles until all the color has been removed then wash as usual.
Dispose of any cans containing paint responsibly by taking them to an appropriate hazardous waste disposal facility or recycling center. This will help protect the environment from potential hazards posed by the chemicals found in oil-based paints.
With these simple steps taken care of, you can be confident that you have completed your cleanup successfully!
Conclusion
In conclusion, it is important to understand the basics of thinning oil-based paint to achieve a successful painting job. With the right thinner and safety considerations, you can ensure that your project will go smoothly. Preparing the paint by removing lumps or impurities before adding any type of thinner will help create an even consistency for better coverage. Finally, there are several methods available when it comes to thinning oil-based paints, some more suitable for certain situations than others depending on what level of viscosity is desired. Once finished with the task at hand, remember to clean up after yourself as best as you can so that future projects may be completed without hassle.


