Say Goodbye to Waiting: How to Make Oil Paint Dry Faster
Welcome to the world of oil painting! As an artist, nothing is more frustrating than waiting for the paint to dry. But have no fear - I'm here to help you make your paint dry faster without sacrificing quality or vibrancy. In this article, I'm going to show you a few techniques and materials that will give you quicker results so you can move on with your masterpiece.
First off, let's talk about what causes paint to take longer to dry. Oil paints are naturally slow-drying due to their composition; they require oxygen from the air to harden fully. That said, there are several things we can do as artists to speed up the process while still getting great results.
Finally, you must pay attention when attempting these methods – use them correctly and only when necessary – otherwise, you risk ruining your artwork entirely! With all that said, let me show you how easy it can be to make oil paints dry quickly and effectively.
Supplies Needed
Hey, if you're an oil painter looking to speed up the drying time of your paintings then I'm here to tell you that it can be done! All you need is a few supplies and some patience. Let's start with what you'll need: oil paint, a painting surface, a drying accelerator, a hair dryer, or a heat gun.
Oil paint should go without saying but make sure you have all the colors necessary for your project! The painting surface will depend on whatever type of artwork you are creating; canvas, wood paneling, etc. Painting surfaces come in many different forms so choose the one that best suits your needs. Drying accelerators are essential when trying to speed up the process as they work quickly and effectively to reduce the amount of time needed for oil paints to dry. A hair dryer or heat gun can also help accelerate this process by providing additional warmth which helps quicken drying times.
Now that we've gathered our supplies together let's get started prepping our painting surface so we can begin working on our masterpiece!

Preparing The Painting Surface
The painting surface is the canvas for your work of art. Whether you use a prepped canvas, priming panel, or prepping board, each requires special attention to ensure it's ready for the masterpiece within. Symbolically speaking, let us think of the painting surface as an empty slate awaiting our creative mark-making! To get started, here are four steps to follow when preparing your painting surface:
- If using stretched canvas, remove any dust and dirt with a slightly damp cloth. Allow drying fully before beginning.
- Apply a gesso layer on wood panels or canvases that have not been previously primed. Use wide brush strokes in one direction then allow time to dry completely before moving to the next step.
- Sand over the gessoed area lightly with fine sandpaper if desired texture needs more refinement and smoothness (take care not to sand too much).
- Wipe off excess dust created from the sanding process with a clean cloth before beginning the painting process.
Preparing your painting surface properly will ultimately result in better adhesion between oil paint layers and create a smoother overall finish once dried - so take care during these important early stages!
With your base laid out and ready for action, you can now move on blocking out unwanted areas of color or texture quickly and accurately without worrying about making mistakes along the way.
Blocking Out Unwanted Areas
Blocking out unwanted areas of your painting is an essential step in creating a successful oil painting. It allows you to experiment with different compositions and colors, without committing too much time or effort to any one area. There are several ways to block out sections, including:
method | description |
|---|---|
Painting over Sections | Using a thicker paint consistency and larger brush strokes to create opaque color blocks that can be modified later on. |
Covering Sections | Applying masking tape or paper to the canvas so they will not receive any further paint application. |
Painting Edges First | Creating soft edges by lightly brushing around the desired area before filling it in with solid paint. This helps prevent hard lines between two different colors/sections. |
Masking Areas Outline | Outlining what should be masked off, then using either liquid masking fluid or special masking film to protect those outlines from becoming filled in with paint when other parts of the canvas are being painted. |
Each technique has its pros and cons, but all provide a way for artists to achieve clean-looking results without having to spend long hours working on each individual section separately. With these methods at hand, you have greater control over how you want your final piece to look and feel!

Accelerating The Drying Process
Did you know that the average oil painting can take up to six months to dry completely? If you want to speed things up, there are a few techniques for accelerating the drying process.
First off, make sure your painting surface is smooth and non-absorbent. This will help keep the paint from sinking too deeply into the canvas or panel and taking longer to dry. Also, look out for any areas where you've applied too much paint - these spots may pool together and create an area of wetness that takes extra time to evaporate.
Using heat can be a great way to expedite drying times in oil paintings. You can use an electric fan or hair dryer on its low setting, but I prefer using a heat gun since it has more control over temperature levels. Aim the nozzle at least 12 inches away from your painting's surface while making sure not to blow dust onto it as you're working. Keep checking in with your piece every 5 minutes or so until it's dried sufficiently before moving on with other steps in your workflow.
When adding heat and airflow, remember not to apply too much of either one! Too much heat could damage both your artwork and tools, especially if they are made of wood or plastics like palette knives or bristle brushes. Instead, focus on gradually increasing temperatures while adjusting airflow accordingly until desired results have been achieved safely and effectively.
Adding Heat And Air Flow
I'm sure you've all heard the saying, 'time is of the essence' and this couldn't be more true when it comes to oil painting. If your paint isn't drying quickly enough, don't fret - there are ways to speed up the process! By adding heat and airflow, you can cut down on your oil painting's drying time significantly.
The first step in adding heat and airflow to help dry your oil paintings faster is by using a hair dryer or heat gun. Heat guns generate hot air that will blow away any moisture from the surface of the canvas, accelerating the evaporation rate of oils. But please be careful not to get too close to either tool; they're both incredibly powerful and could scorch delicate paintbrushes if you aren't careful.
Another great way to add airflow while painting is to open windows or use fans around your workspace. This will create an even layer of circulating warm air which will aid in helping those brushstrokes set quicker than normal. Just make sure that no drafts are blowing directly onto your work as this can cause unwanted smudging or streaks in the paint.
So now that you know how to add extra heat and airflow into your space for faster drying times, it's time to start experimenting with different techniques until you find one that works best for you!

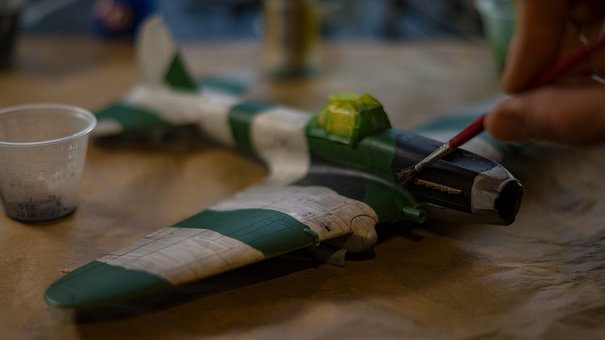
Using A Hair Dryer Or Heat Gun
Have you ever wondered if a hair dryer or heat gun could speed up the drying process of oil paint? These tools are essential for many artists seeking to achieve faster results. Below is a list of tips that can help make your painting session go smoother:
- Use a low setting when using a hair dryer or heat gun on the painted surface. This ensures that you don’t damage the paint layer and will help it dry evenly.
- Make sure to keep the airflow in mind so that any dust particles do not get caught in the airflow and land on your painting surface.
- Keep an eye out for areas where the paint may be too thick, as these may take much longer to dry than those applied with thinner layers.
Using a hair dryer or heat gun can help speed up the drying time of oil paints, but it's important to use caution while doing so. You'll want to avoid overheating the painting surface which could cause bubbling, cracking, or warping - all of which would ruin your hard work!
Taking into account other factors such as humidity levels and temperature can also affect how quickly oils dry. With patience and practice, however, you'll soon find yourself mastering this technique.
Now let's move on to cleaning up our brushes.
Cleaning Up The Brushes
Now that you’ve finished your masterpiece, it’s time to clean up. Cleaning oil paintbrushes can be a bit of an undertaking, but don’t worry - I'm here to help! The first step is to rinse the brush with some warm water until all excess pigment has been removed from the bristles. Then you want to add some mild soap and massage the bristles to get any remaining paint out. It’s important at this stage not to scrub too hard as this may cause damage to delicate painting brushes.
Once most of the pigment has been removed, you will need to use a cleaning solution specifically made for oil paints. This way you won't risk damaging your expensive painting supplies with harsh chemicals or solvents. You can purchase specialized solutions online or make one yourself using white spirit and a few drops of dishwashing liquid mixed in a jar. Apply the mixture onto your brush and work it into the bristles before rinsing again with warm water until no signs of color remain on the brush head.
Finally, finish by drying off your brush thoroughly with a paper towel or cloth rag. Make sure there's no residual moisture left so it doesn't damage the integrity of your beautiful paintbrushes! Taking care of them now means they'll last longer and serve you well when creating future works of art!

Conclusion
As an experienced oil painter, I understand the importance of making sure your paint dries quickly. With these tips on how to make oil paint dry faster, you can now enjoy a smoother painting process and get back to creating beautiful works of art!
First and foremost, when selecting supplies for your workspace, be sure to choose quality materials that will help expedite the drying process. Blocking out unwanted areas before beginning your project can also save time in the long run by preventing those sections from absorbing too much moisture. Additionally, accelerating the drying process with heat and airflow can create a pleasant environment for any artist looking to finish their masterpiece without delay.
Finally, don't forget about cleaning up afterward! Using a hair dryer or heat gun can help speed up the drying time for brushes or other tools used during painting. Taking care of your equipment is essential for maintaining its longevity throughout multiple projects.
In conclusion, there are many steps involved in ensuring that your oil paints dry efficiently and effectively so you can keep producing stunning artwork without interruption. With practice and patience, you'll soon become a pro at speeding up this part of the creative process!